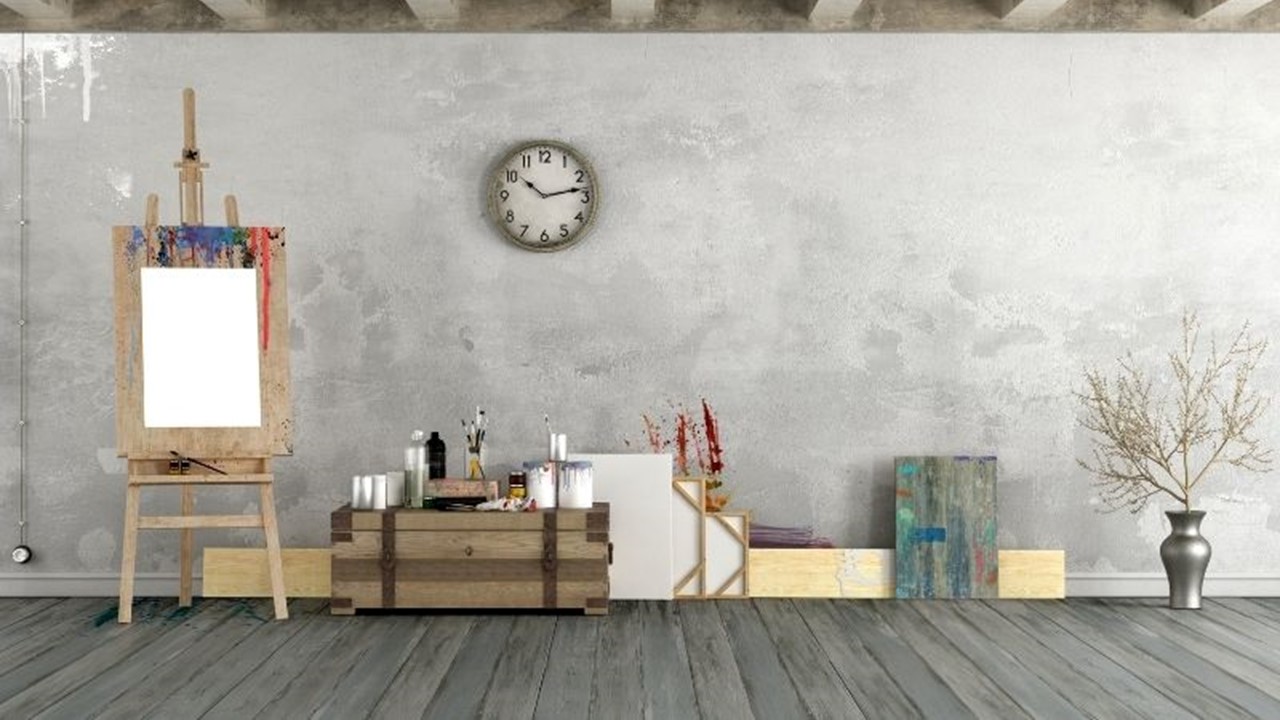
What environment and essential equipment do you need to set up your figure-drawing studio? Depending on your budget and personal comfort, you must choose what’s right. Some points to keep in mind are the following:
✓ Do you need complete solitude to draw? ✓ What top five disruptions tend to distract you? ✓ Are you more productive during the evening or morning? ✓ What’s your budget plan? What items can you get now versus later down the road?
Don’t worry if you’re unsure as to what environment and equipment work best for you at first. Sometimes only time and experimentation can determine what makes you tick. Ask other artists and colleagues about their working habits and environments. Then try implementing them into your strategy to see which are most effective. This method saves time and energy because your friends have probably already weeded out terrible ideas.
Your drawing space is an area that needs experimentation. Each person has his or her own preference. For example, I have two studios (one at home and another shared studio space at a separate location). Although I enjoy working alone in complete solitude (especially during highly tight deadlines), I need to interact actively with a colleague from time to time.
If you’re unsure where to find the right environment, try taking your sketchbook to a coffee shop to draw. Are you able to concentrate on the hustle and bustle around you, or do you find yourself so distracted that you can’t concentrate on anything you draw? If you’re too distracted, you may have your own quiet studio without distractions (including e-mail)!
Suppose you live in a family environment with a constant interruption from a curious five-year-old and no easy access to a quiet home studio. You may consider rearranging your time or renting a cheap studio at a separate location. If you work better away from home, consider getting involved with off-site live figure-drawing classes to interact with other artists sharing the same experience of drawing from the same model. A group setting is also great for building networking relations (business and casual friendships). Some of the closest art friends I’ve had for the past ten years are those I met at drawing sessions.
If you don’t have a problem working with the everyday distractions around your home, working at a home studio may be efficient, especially if you control the environment without worrying about inconveniencing others. Another factor to consider is how efficiently you work during specific times of the day. The common myth is that the harder you work, the more you get done. As much as I want to think that’s true, my body and mind function better in the evening than they do in the morning. Therefore, I organize my schedule around my efficiency habits so that I do most of my drawing later in the day.
I like charcoal because it allows me to cover large areas of paper with fewer strokes than a drawing pencil does. In addition, the loosely compressed carbon in charcoals allows me to smear and blend the strokes to get the effects I want (something not quickly done with a grade-H lead drawing pencil).
Here are a few different charcoal types to consider:
✓ Vine charcoal sticks: These are sold in boxes in various hardnesses (hard, medium, and soft). They’re great for loosely blocking the overall shape of the figure and applying shading on areas of the body. I like using the extra-soft vine sticks when shading in my figure because they’re quick, and I can get darker shadows without pressing too hard against the paper.
✓ Thick charcoal sticks: As the name suggests, thick charcoal sticks are the thicker versions of the thinner vine charcoal. Though not practical for small figures or detail, they make excellent shading tools (especially on large drawings, such as a closeup of the torso on an 18-x-24-inch drawing pad).
✓ Compressed charcoal pencils: These come in various degrees of hardness (hard, medium, and soft). Think of them as pencils with charcoal instead of graphite. I like using them to draw figure details (such as the eyes, nose, and fingernails). Charcoal pencils come in handy when your figure drawing is smaller than 8 x 10 inches.
✓ Compressed charcoal sticks: These cylindrical charcoal sticks come in hard, medium, and soft variations. I like using them to draw loose gesture lines and curves of the figure. The advantage of using these rather than charcoal pencils is that you never have to worry about shaving away any wooden casing around the charcoal — the powder charcoal particles are tightly compressed by using binders.
You may find that using a smooth versus rougher paper surface affects which type of charcoal you use. Suppose you’re planning to draw from the figure continuously for an extended period (for example, an all-day figure-drawing session). In that case, I recommend using softer charcoal over harder charcoal because it eases the resistance on the paper and, ultimately, the stress on your hand. Softer charcoals also make getting a deeper range of values easier without pressing hard on the paper.
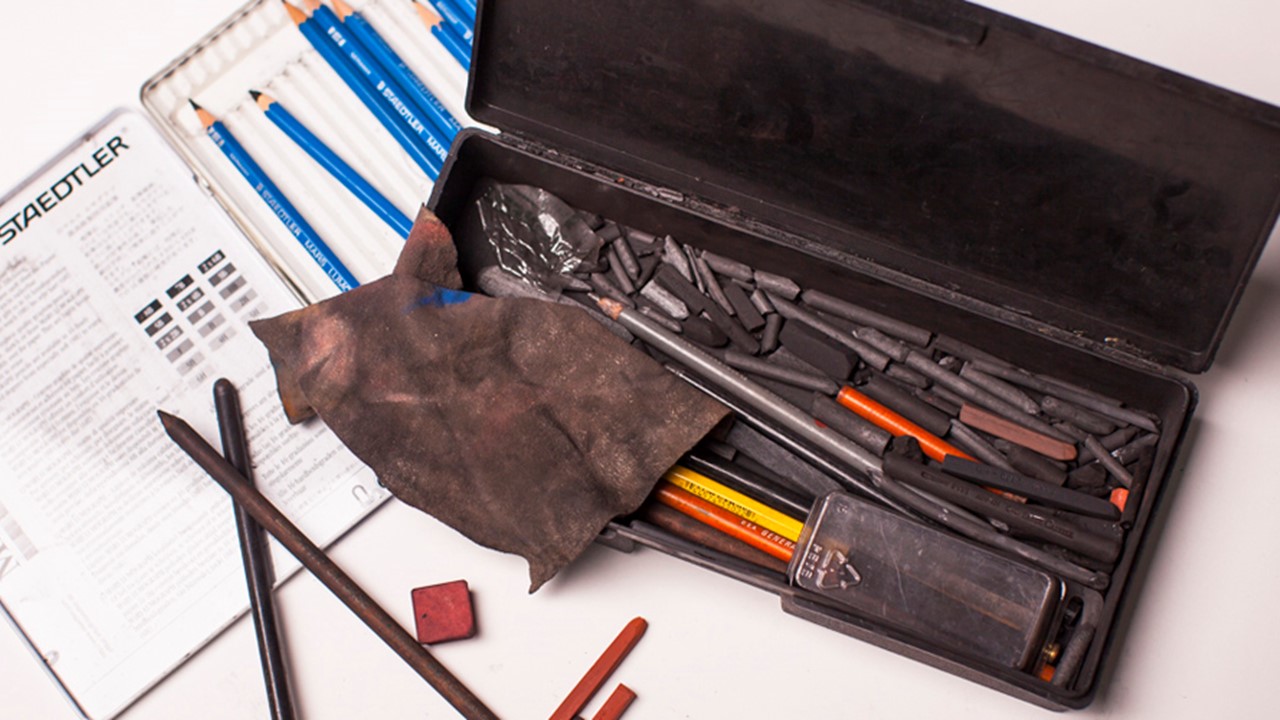
Despite all those stockpiles of paints, canvases, brushes, turpentine, and so on at the art store, the essential materials you need to start drawing the figure are only a pencil and paper. But wait, the good news doesn’t stop there! Unlike paints and brushes, whose costs can add up to hundreds of dollars, a basic assortment of drawing tools is inexpensive. If you’re currently in a figure-drawing session, you don’t need to purchase all the materials I describe in this chapter (getting the in-class recommended supplies is sufficient). You can always come back to this chapter for additional supplies when trying a different type of medium.
The following list provides some facts about life that may affect a professional or student artist’s spending habits: ✓ Growing pains: When starting out, you may stick with paper, a few different pencils, an eraser, and other essential tools. As your individual drawing style/skills advance, however, you may find that the pencils you once liked no longer suit your needs. You may need to bite the bullet and buy new pencils or other supplies you’ve outgrown. ✓ Consistency issues: Although you like to think that the specific brand of paper you’re buying today is the same quality as the one you bought last week, that’s not always the case. You don’t want to be stuck with a subpar stack of paper. So, be prepared to restock supplies that are of lower quality than you want. ✓ Accountability: Simply buying more doesn’t necessarily make me more accountable for my belongings. In fact, from past experience, I find it makes me even more carefree. Looking back, I realize that if I’d been more careful with my supplies, I could’ve spent my money on newer/fancier materials instead of replacing the basic stuff I lost. When you buy fewer supplies, you value them more. That’s one incentive for sticking to a tight budget!
✓ Referrals: Most of the materials I currently use have been referred to me by other artists and colleagues. Make sure you leave some room in your drawing bin for new recommendations — after you’ve been drawing for a while, set aside a little spending money so you can experiment with new supplies. ✓ Overdependence: Sad but true — some brands simply go out of business (it’s a tough, competitive market). You don’t want to become too reliant on a single brand and not know how to adapt to products from a different brand when your favorite product is gone. Be prepared to spend more money to replace a discontinued brand you love; you’re in luck if you find replacements that cost less than the originals! ✓ Intimidation: When selecting paper as an art student, I remember feeling intimidated by trying new techniques on expensive paper, such as thick-ply Bristol. Although setting the good paper aside and using the cheaper drawing paper for experimentation is wise, sometimes your experiments will work best with thicker, better-quality paper (newsprint, for example, can’t withstand water or intense pressure from drawing pencils unless the lead is soft). I recommend having a small “experiment” pad set aside expressly for these purposes (8-x-10-inch smooth Bristol will suffice). Be careful, especially with newsprint brands, whose quality deteriorates over the course of a short time (as early as just a few days!).
Pencils are the go-to tool for artists drawing figures. Pencils are an easy-to-use medium that you’ve likely handled since childhood. They come in diverse forms of softness and hardness and have various chemical makeup. Different companies manufacture their flagship pencils (which, for whatever personal reason, end up being consistently recommended in art classes). My favorite happens to be the Faber-Castell 9000.
One often overlooked benefit of using pencils is that they produce results quickly; unlike oils or acrylics, you don’t need turpentine or a messy side medium to improve the viscosity or quality of the line. Another benefit (which happens to be my favorite) is that it’s easy to maintain.
You don’t have to clean a messy paintbrush (which can take up to 30 minutes) or use a spray to secure the medium onto paper. Simply toss the pencils into a zippered sandwich bag, and off you go!
As with paper, you have a lot of pencils to choose from. Unlike office-supply stores, drawing pencil manufacturers sell a variety of pencils with a wide range of graphite softness or hardness. Graphite grades range from the following: 9H (hardest), 8H, 7H, 6H, 5H, 4H, 3H, 2H, H, F, HB, B, 2B, 3B, 4B, 5B, 6B, 7B, 8B, 9B (softest). H stands for “hard” while B stands for “black.” The higher the H, the harder the lead; the higher the B, the softer the lead.
In general, the standard #2 general-purpose pencil correlates to HB. However, there is no universal grading method that’s shared by pencil manufacturers. Each manufacturer has its own way of determining different grades of hardness and softness. Although harder pencils are preferred by technical drafters (such as architects and mechanical engineers), softer lead pencils are favored by artists. I don’t recommend using anything harder than a 2B for figure drawing (it just was never meant to be!).
When I test a pencil on a sheet of drawing paper, I look for how the medium drags across the paper. Drag refers to the amount of friction or resistance the lead or compressed charcoal puts up when you move it across the paper. Although some softer pencils have less drag, some soft compressed charcoal sticks are so dense that they have more drag than some harder pencils on the smoothest paper. I prefer less drag because it’s easier on the wrist and doesn’t inhibit my drawing speed. Another good way to test the drag is by making strong, short (no more than ½ inch in length), thick-to-thin crosshatch marks. See how each pencil grips the tooth of the paper compared to others. The more smoothly you create the marks, the less drag you get.
The following are just some of the many companies that make great drawing pencils:
✓ Faber-Castell 9000 Drawing Pencil: The company’s signature water varnish-based pencil. Available in ranges from 8B through 6H. These are currently my favorite figure-drawing pencils.
✓ Derwent Graphic Pencil: Uniquely composited from clay and graphite. These pencils boast a wide range of 9H through 9B. Its casing is designed to feel lighter in hand.
✓ Design Drawing 3800 Pencil Untipped: Encased in their classic alligator-skin design, these pencils range from 6H through 6B
✓ General’s Ebony Layout Pencil: These pure, smooth, black graphite pencils are one of the most famous pencils in art classes. The thicker graphite center gives you a broader side to shading values in large areas. This pencil comes in only one type: jet black extra smooth.
✓ General’s Flat Sketching Pencil: Recognized by its flat-shaped wooden casing, this uniquely shaped graphite core gives you the flexibility to create thick-to-thin lines with the rotation of the pencil. These pencils come in 2B, 4B, and 6B choices.
✓ Staedtler Mars Lumograph: Widely used by architects/designers for its ability to sustain a sharp point. These pencils range from 6H through 8B.
✓ Tombow Mono Professional Pencil: Boasts a high-density graphite that’s not only break-resistant but also smearproof (a storyboard artist’s dream). These pencils range from 6H through 6B.
✓ Turquoise Drawing Pencil: Its balanced composite of clay and graphite makes this pencil less prone to breakage. Used widely in studios and classrooms. These pencils range from 7H through 6B.
✓ Wolf’s Carbon Pencil: Has a unique composite of charcoal and graphite. Encased in cedar wood, these pencils are easy to sharpen and are great for detail work. Choices include B, 2B, 4B, and 6B.
✓ Prismacolor Woodless Drawing Pencil: A pure graphite drawing pencil that needs no sharpening to draw (although you may want to sharpen the tip just a little occasionally). This pencil is an excellent choice for artists who feel the standard wood casing pencils are too light. You have the choices of 2B, 4B, 6B, and 8B.
✓ Faber-Castell PITT Graphite Pure 2900: Faber-Castell’s version of the woodless drawing pencil comes in choices of HB, 3B, 6B, and 9B.
Although my favorite drawing pencil is the Faber-Castell 9000 (and I definitely recommend giving it a try for starters), you need to figure out what best suits your needs. Here are some points to consider as you embark on your journey in search of a compatible drawing pencil:
✓ Beware that products with the same degree of hardness or softness but from two different brands may not be identical. I find that some brands tend to have a more flexible labeling system.
✓ I recommend trying three or four grades of softness or hardness from a single brand (say H, 2B, 6B, and 8B). If you’re new to drawing, avoid pencils harder than H. Leads with more challenging tips are great for drawing technical drawings with precise details, but they don’t provide as much diverse line quality as the softer leads do.
✓ Trying out pencils before committing to buy them is essential. If stores don’t have a test pad to try out, I recommend carrying a piece of drawing scrap paper with you when you enter the store. Although stores don’t allow you to pop open a box of fresh pencils to test one out, some stores have individual pencils in an open display. Those stores may be lenient in letting you draw a couple of lines on a piece of scrap paper to test the pencil.
Not all paper types are created equal. Witness these differences:
✓ Papers that have a heavier ply are higher quality and more expensive. Ply refers to a single layer of paper material that’s then stacked on top of another to create a thicker sheet of paper; you measure ply by the total number of layers of paper material stacked together. The average ply for drawing paper is three-ply. Higher quality paper can be as thick as five ply.
✓ Although losing weight is often considered a good thing, packing on the pounds carries a lot of weight when choosing drawing paper. Paper comes packaged in stacks or reams, usually of 500 pieces of paper. Generally, the more pounds each ream of 500 sheets weighs, the higher the density and the thickness of the paper (measured in caliper micrometers).
✓ The texture of the surface varies from smooth to rough. The rougher the texture is, the more tooth the paper has. Here are the pros and cons of the surface textures:
Papers with smooth surfaces are great for rendering detailed drawings with excellent gradations between dark to light values. If you’re using an excellent lead mechanical pencil, for example, papers with a smooth texture give you better control over making details, such as the pupils of the eyes and details of the lips. On the other hand, the smooth surfaces of certain brands feel waxy. They are often difficult to blend with your fingers after you apply the medium because the paper’s smooth surface doesn’t retain the particles of the drawing medium. If you erase a section of a drawing on smooth paper and go over that section with your drawing medium and fingers to patch up the white hole, re-creating the original smooth transition is difficult because the values don’t blend easily.
Papers with rougher surfaces are excellent for soft mediums, such as vine charcoal, compressed charcoal sticks, and soft drawing pencils. Because the textures hold on to the medium particles, using a cloth or your finger to blend or push around the values is a lot of fun. The disadvantage of using rougher textured paper is that the fine tip of your drawing pencil snags into the grooves of the paper, making details of fine rendering difficult.
Run your fingers over the paper when choosing the type of surface you want to try. Different brands have their own classifications of “textured” (also referred to as “vellum” surfaces) versus “smooth” surfaces.
The following are some types of paper surfaces commonly found in most art stores:
✓ Bristol board: Bristol board comes in smooth and rough textures. It’s a thicker, sturdier quality surface (100 pounds) that’s great for illustrations. The smooth surface is designed for fine pen and ink, pencil, and finely rendered drawings; the rougher or vellum surface has a slightly toothy texture that makes it suitable for soft dry media (pencil or charcoal) and wet media (watercolor or gouache).
✓ Charcoal paper: More porous and has a rougher surface. Major brands such as Strathmore carry acid-free charcoal paper created from 100 percent cotton fiber. Many art stores also sell these in individual sheets (which come in 64 pounds) in various colors and values. Having an initial color or value gives students a middle ground to start with to build up the color and value of the figure. This texture helps grab the charcoal particles so you can get a better range of values depending on how hard you press the charcoal against the paper.
✓ Drawing paper: The more commonly used surface, drawing paper, is a higher-quality version of the sketching paper (70 to 80 pounds). Drawing paper has a light surface texture that makes it suitable for most dry media, such as pencil and charcoal. This paper can withstand light usage of wet media (for example, inks).
✓ Newsprint paper: Newsprint is distinguishable by its gray tint and is sold on smooth and rough surfaces. Although economical, it’s thin and not very durable (definitely not suited for a water-based medium). It’s ideal for practicing and working out ideas on. Major brands, such as Strathmore, weigh in at 35 pounds.
✓ Sketching paper: General-purpose, light-textured drawing surface is suitable for classroom experimentation and usually comes in 50 pounds. Sketching paper can withstand light usage of wet media (for example, inks), but it’s best suited for dry media. Think of this type of paper as the economical alternative to drawing paper.
✓ Tracing paper: This highly transparent parchment comes in 25 pounds. Great for tracing over your work or making corrections over your drawing without marking up the original. This paper surface is lightly textured, which makes pencils and thin markers good mediums to work with.
Make sure your paper is marked “acid free” or “pH neutral.” Papers that are made from wood-based pulp contain a natural chemical compound called lignen that causes paper to turn yellow and deteriorate after a while. If you use papers that don’t have the lignen removed, you risk damaging your artwork, especially if the paper is under direct sunlight or heat.
Drawing paper comes in all sizes. It can start as small as 2 x 3 inches and go larger than 18 x 24 inches. If you’re preparing to take a figure-drawing class at an art school, you must get an 18-x-24-inch drawing pad. This size is ideal for a class/instructional setting where you can place a single large figure on the paper or draw multiple smaller figures on the same page. It’s also large enough for instructors to provide helpful instruction during class critiques. If the pad is too small, your figure drawing is difficult to see, and the size doesn’t allow you to go into as much detail as you want. The extra real estate on my drawing pad was essential in art school because my figure-drawing instructor could use that space to draw and give demonstrations as he made his rounds through the classroom. I require my students to bring the larger 18-x-24-inch drawing pads because I use a thick red marker or charcoal stick to provide instruction. In addition to having an 18-x-24-inch drawing pad, I carry smaller 5-x-7-inch and 8-x-10-inch artist sketchbooks with me whenever I’m away from my studio. They’re small enough to stuff in my messenger bag and take them out to draw the people around me in public. If you buy smaller sketchbooks for drawing outside the classroom or away from your studio, make sure these booklets have a thick hardcover on both sides so that your drawings don’t get damaged from being tossed around in your bag during transit. Although these pads cost more than the cheaper cardstock paper, they’re worth the price. If you’re wondering what size is “too small,” measure with the size of your hand. If the pad is smaller than your hand, you may want to choose a larger pad.
If you’re walking through the paper aisle of the art store for the first time, you can easily become overwhelmed by the vast selections. When selecting your drawing paper, consider a few general issues: ✓ You need to choose between individual sheets of paper and drawing pads. ✓ You need to make sure you select the appropriate size of drawing paper. ✓ You want to be selective with the weights and textures of paper that you work on. I explain what you need to know in the following sections. Individual sheets versus drawing pads Most stores offer paper in individual sheets. Still, I find that these products are usually specialty papers that are not only more expensive but also large (up to a whopping 23 x 29 inches) and cumbersome to carry out of the store. You can have a store employee cut them down to a specified size, but that’s really not worth the effort or cost (talk about a nasty pay-per-cut)! For this reason, I buy my drawing paper in pads. The pads are cheaper and easier to store and organize in my drawing archives cabinet. (I discuss archiving supplies later in this chapter.) Most pads come with a strong cardboard backing and a thick front paper jacket, which protects your drawing of the day. As you develop your figure-drawing skills, you may want to try a certain quality of drawing paper sold only in individual sheets. When you do, ask the store staff to roll and wrap the sheet of paper so it isn’t damaged on your way back to the studio. If you don’t have immediate plans to use the paper, unroll it and store it flat (a few things are more frustrating than trying to draw on paper that curls up on your hand like a Venus flytrap). And don’t waste the wrapping paper; use it for sketches! Talk to the store manager or an employee if you desperately want to test a sheet of paper from a drawing pad. Stores usually have a small test pad set aside for customers to scribble on before committing to purchasing the entire pad.
Are you ready to shop for drawing supplies? Before you walk out the door, remember this fact: You don’t want to blindly invest all your art-supply cash on drawing items you may use only once or twice, only to realize you don’t like them after all. This is especially true if you plan on buying material online, where you don’t have the opportunity to even try a medium on the sample sheets that are usually provided upon request at the art store. After you try different materials and know what you like, feel free to buy online; try http://www.pearlpaint.com, http://www.utrechtart.com, http://www..dickblick.com, or http://www.fineartstore.com. Make sure you have a good idea of what you need and what you like before you set out. In the following sections, I describe a variety of supplies that are useful in figure drawing. Online resources are an excellent option if you don’t live near an art store but don’t totally count out the office-supply stores. Although the quality and selection of materials are limited when compared with art stores, you can find items such as plastic erasers, sharpeners, mechanical pencils, and markers also found in art stores. Most art supply stores are pretty fussy when it comes to returning art materials. Some stores don’t refund items like portfolio cases or opened sets of pencils. You won’t get a refund if you buy a drawing pad and draw as much as a single line on one of the sheets. However, most stores have no problem giving you a full refund or exchange if a product is still sealed in the original condition you bought it (just make sure you don’t lose the receipt!).
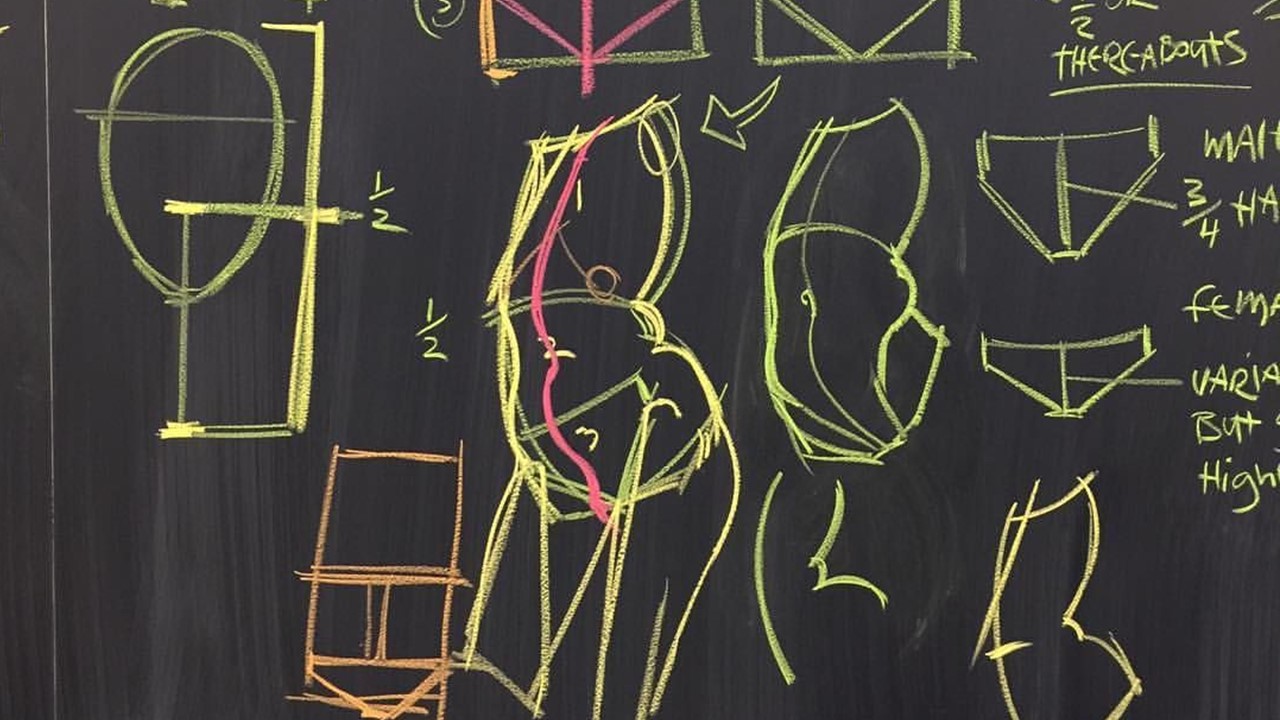
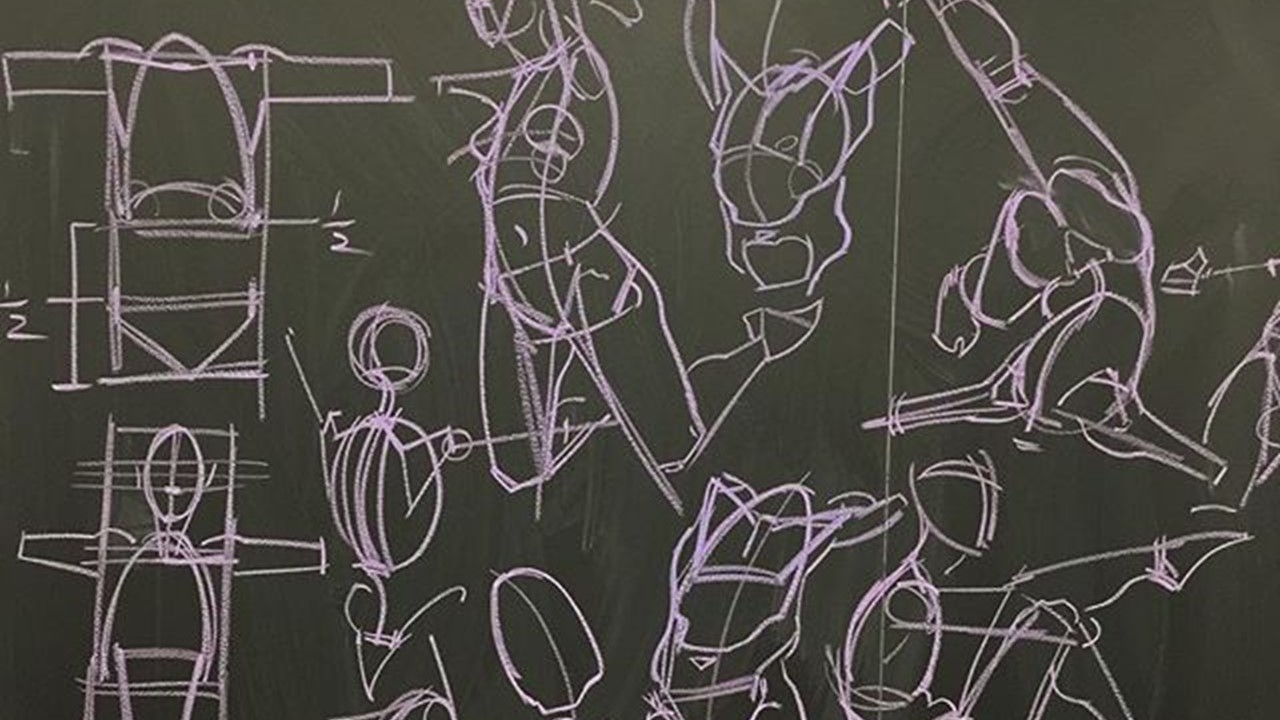
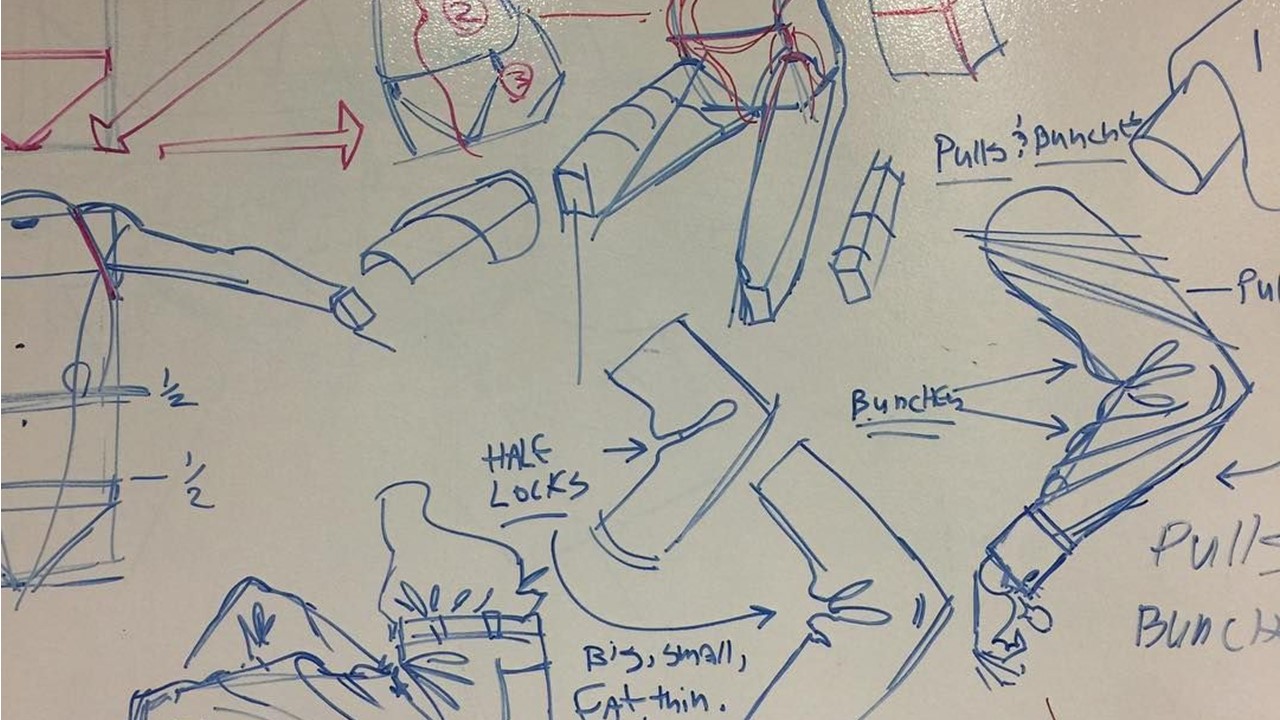
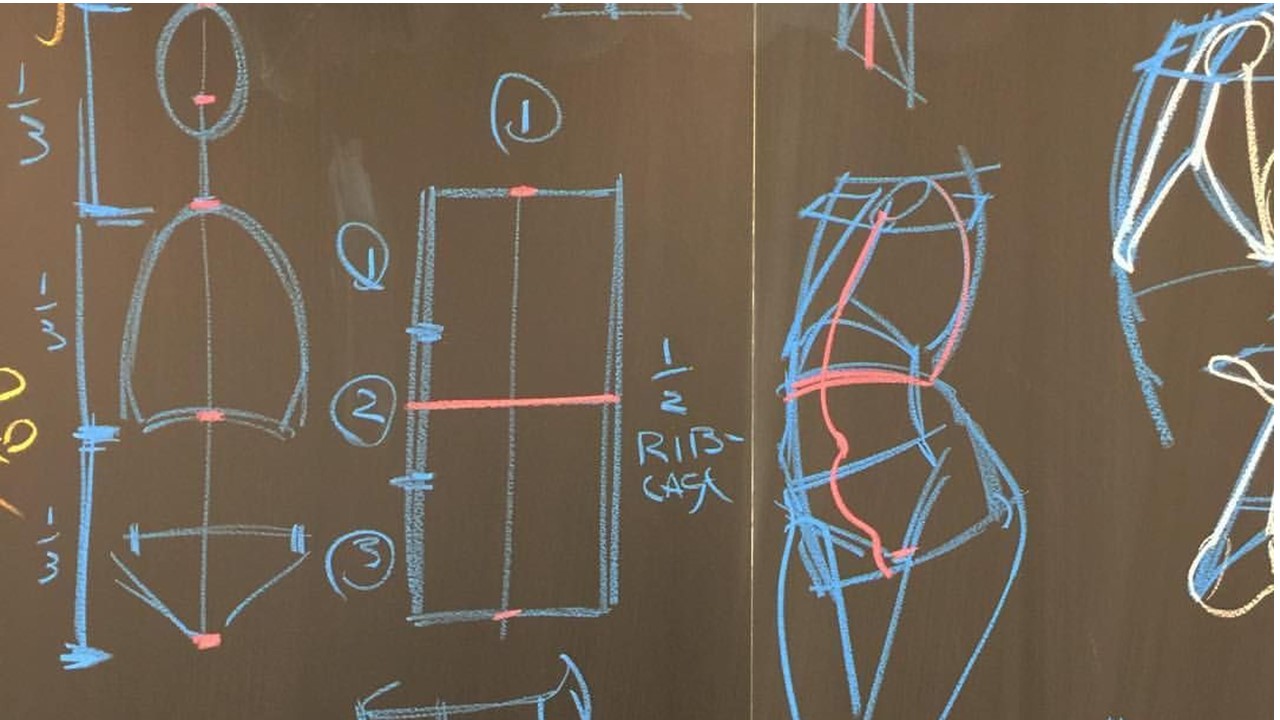
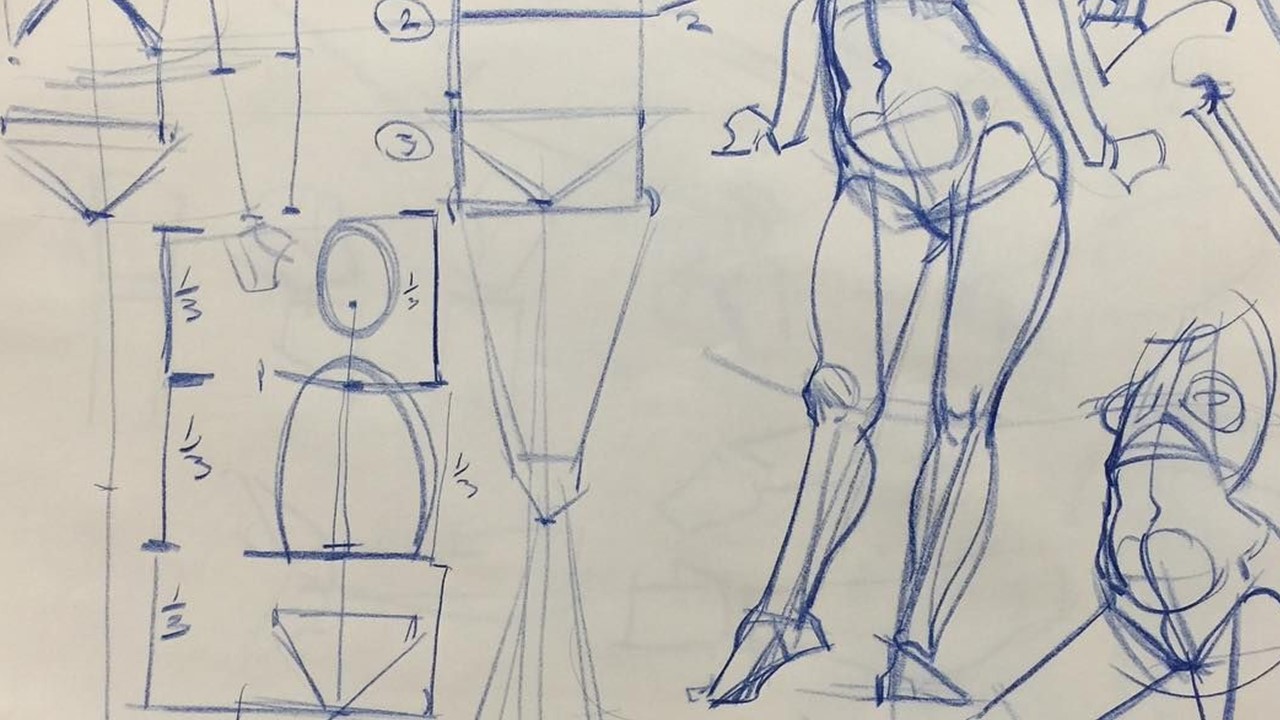
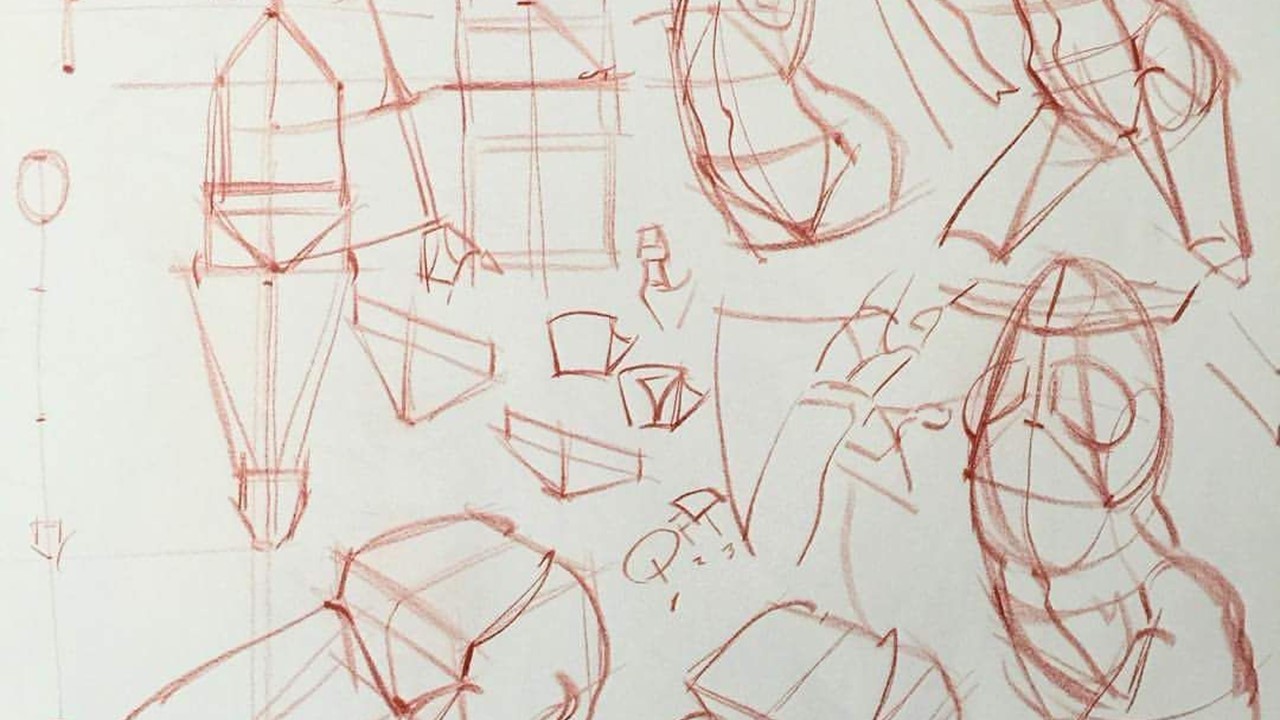
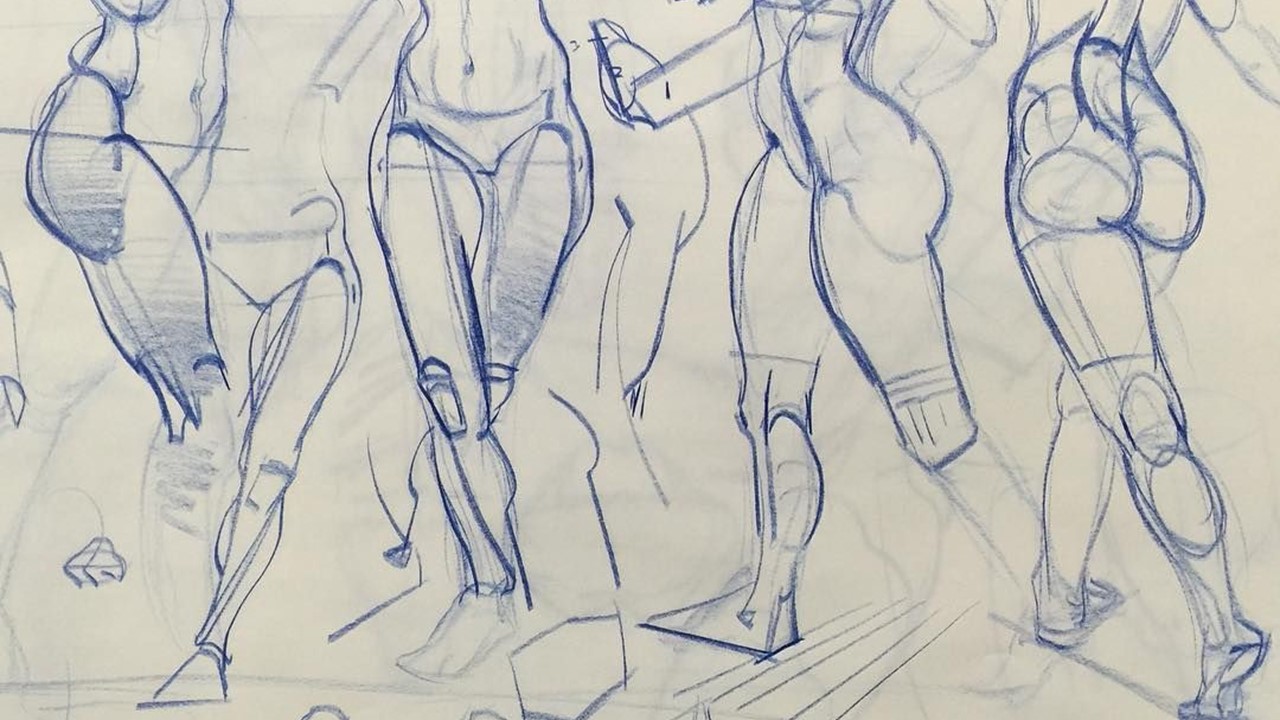
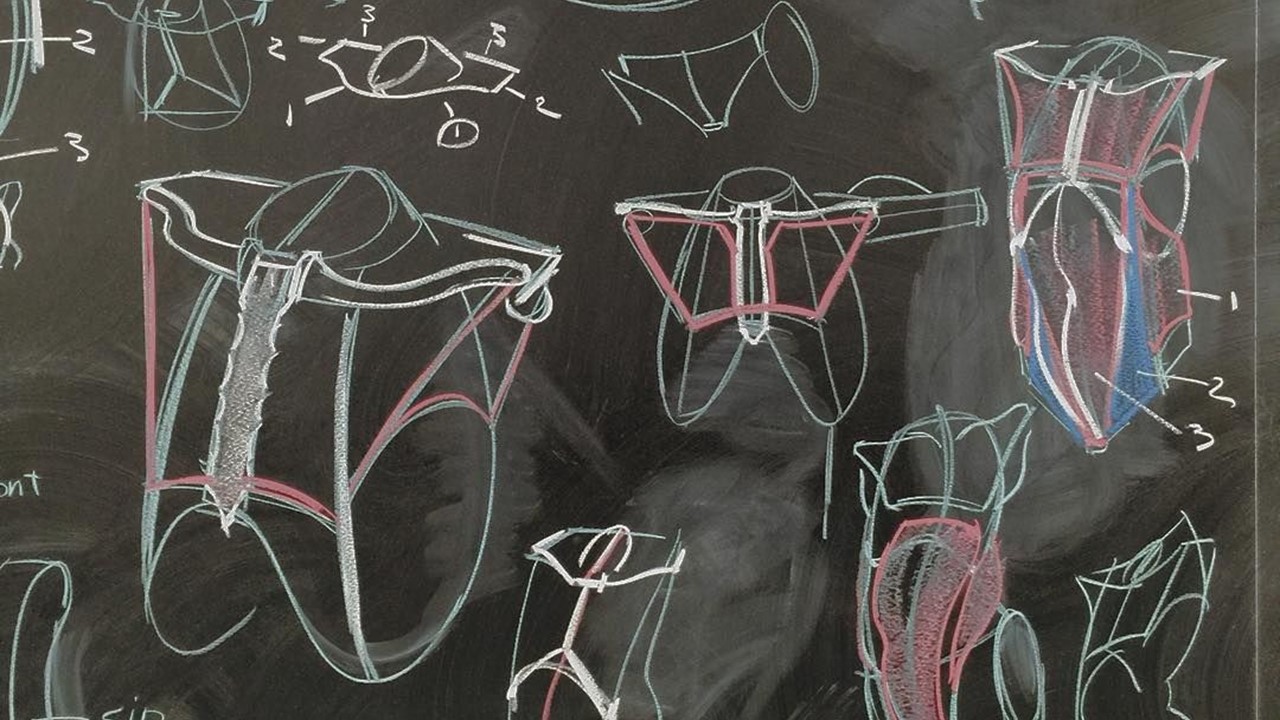
Creating and piecing together the body is similar to putting together a jigsaw puzzle or playing an enjoyable game of Tetris. Individual shapes snap together to form a larger shape. Check out the following topics, which are all about building the body: ✓ Bone structure, shape, and proportion: Understanding the essential proportion of the human figure helps the artist not only measure the head-to-body ratio but also establish how large or small other figures need to be drawn in situations in which you can see more than one figure. Learning every bone structure of the body isn’t important for understanding the overall structure. Instead, identifying specific “landmark” points, where the bones and joints protrude out of the body, is more essential. I explain what you need to know about bones, shape, and proportion. ✓ Assembling a stick figure: Resist the urge to think of the stick figure as a crutch or symbolic substitute for drawing the human figure (like a hangman). Sculptors create a stick figure (commonly referred to as armatures) out of wire as a base around which they build the figure form. I also demonstrate how to use the stick figure as a basis to draw and build basic geometric body shapes. ✓ Muscles: If you thought the number of bones in the figure was mind-boggling, check out just how intricate the muscle groups are. My objective there is to group the smaller shapes of muscles into larger shapes. ✓ Depicting the body in motion: Regardless of how accurately you draw the figure in a still pose, applying body rhythm and motion is what distinguishes your figure from a stiff mannequin. I explain how to draw realistic figures with movement.
The portrayal of the human figure has gone through numerous transformations over the last few thousand years. Just by taking a stroll through a museum, leafing through an art history textbook, or searching the Internet, you can witness firsthand the incredible variety of such depictions.
Moreover, most people are still captivated by the realistically depicted figures of Greco-Roman art, the Renaissance, the Baroque and Neoclassical periods, nineteenth-century academic art, and the revival of classical realism in the late twentieth century. Training for budding artists of the past included artistic anatomy as a required discipline, enabling them to fully comprehend what goes on beneath the skin and to portray the human figure in a convincing manner. But by the early twentieth century, classical realism had lost its footing. A new generation of artists had grown tired of the traditional manner of creating art and chose to investigate new and different approaches.
As always, however, the pendulum swings back. Some artists nowadays have an insatiable desire to reinvestigate the traditional aspects of figurative art. This new surge of interest can be gauged by the many classical ateliers sprouting up in various parts of North America and Europe, and by the fact that some art schools and art departments are again offering artistic anatomy as part of their curriculum.
Galleries and museums are exhibiting contemporary classical figurative artists more frequently, and the digital film and gaming industries are creating demand for artists who possess the anatomical knowledge needed to create computer-animated figures. Once again, anatomy has become an essential part of an artist’s training.